
Inspired by Relinde Scheepers.
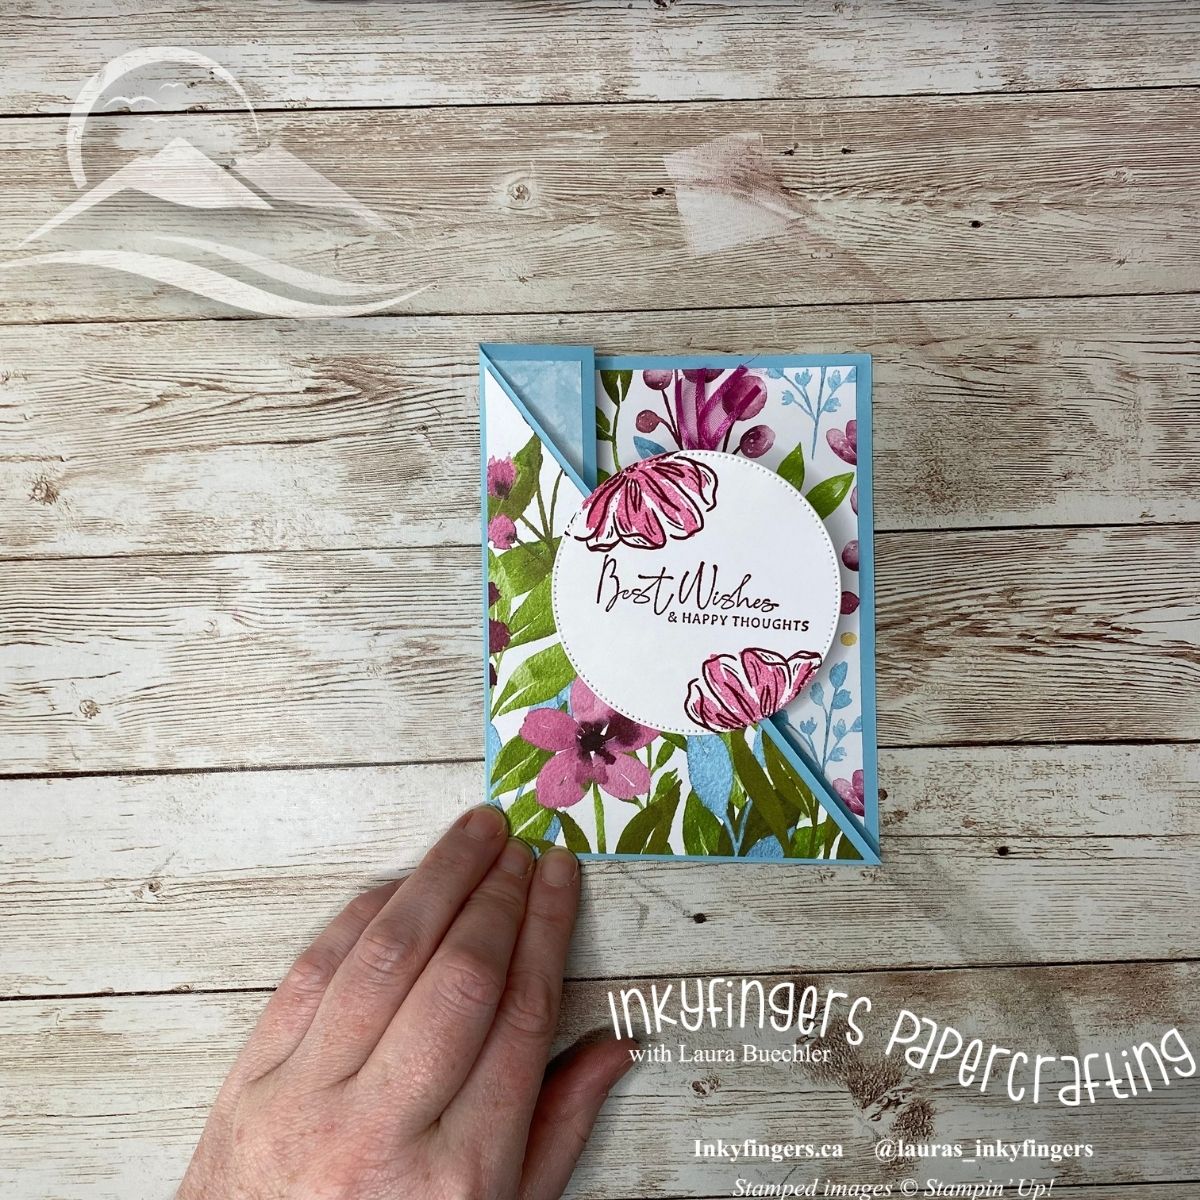
This simple fun-fold card will help you show off lots of beautiful Designer Series Paper – and it’s got a clever little pocket that you could slip a gift card or money into!
Measurements:
- Cardbase: 5 ½ x 11”
- Designer Series Paper:
- 5 ¼ x 4” (three pieces)
- 5 ¼ x 1” (two pieces)
- Additional white and coloured cardstock for decorating
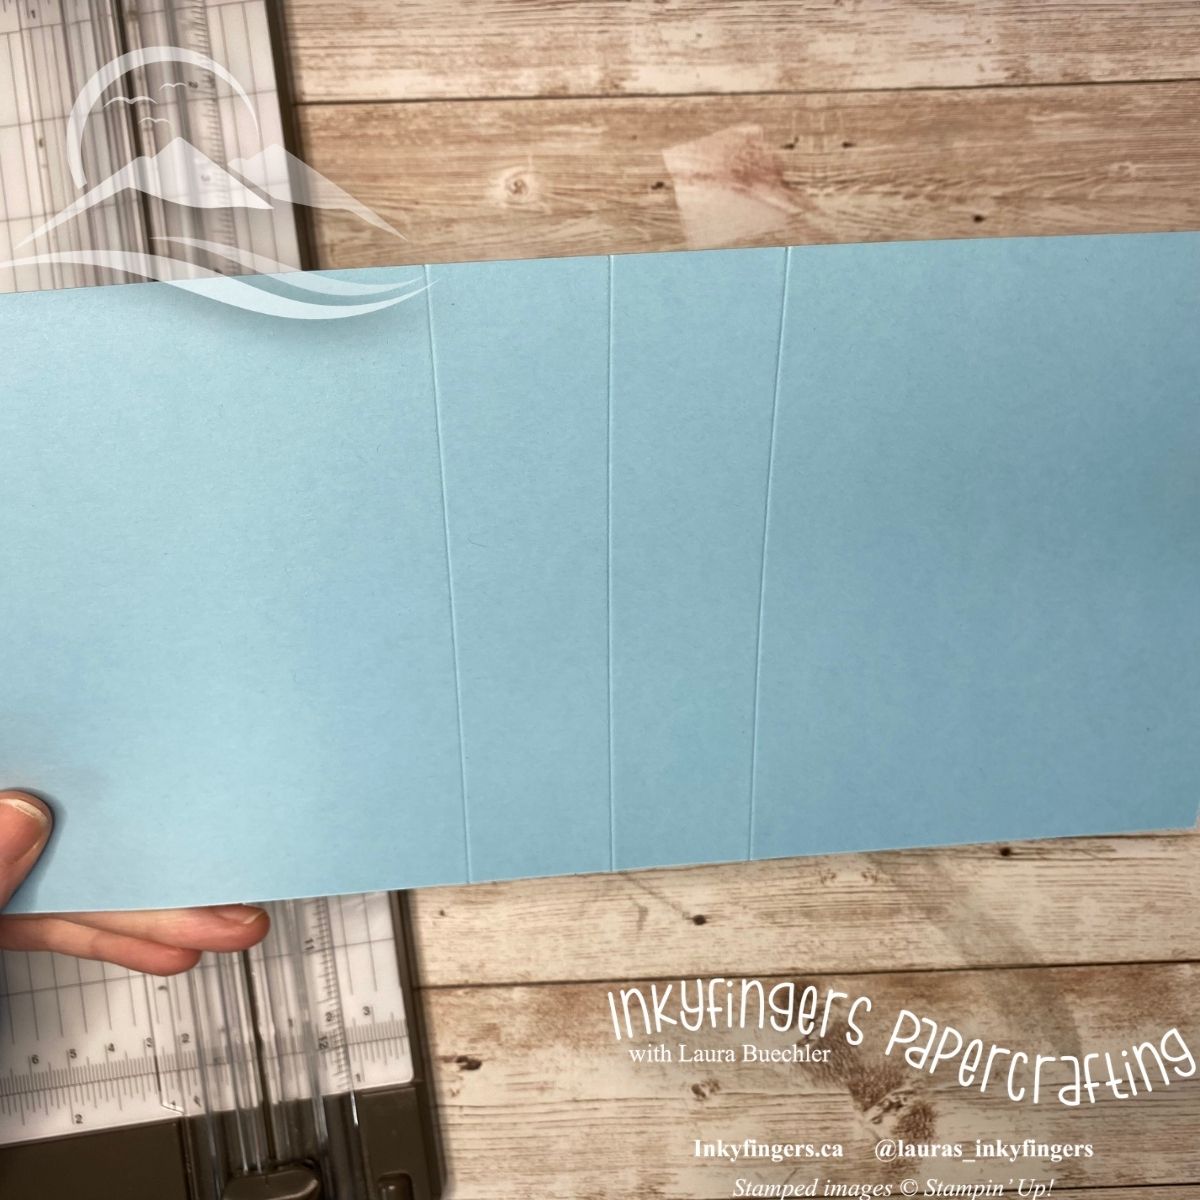
Cut your cardstock and Designer Series Paper as above.

Score your cardbase parallel to the short side at 4 ¼, 5 ½, and 6 ¾”.
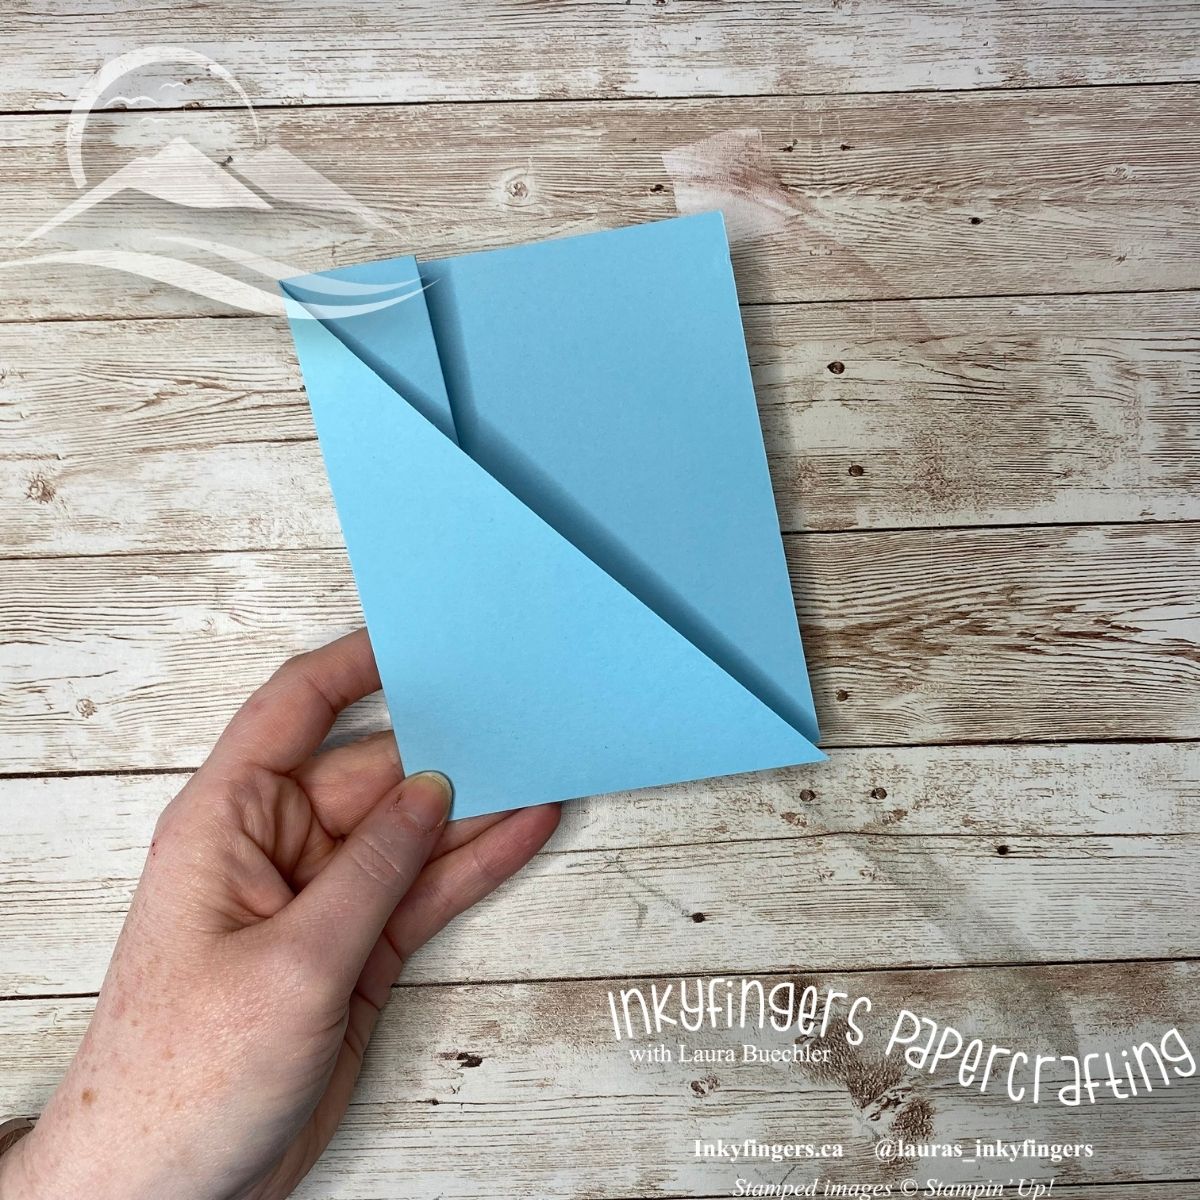
Cut off top left corner panel as shown by lining up the top edge of the scoreline with the bottom left corner and cutting diagonally. Set the cut-off piece aside; we will use it later!

Burnish all your score lines.
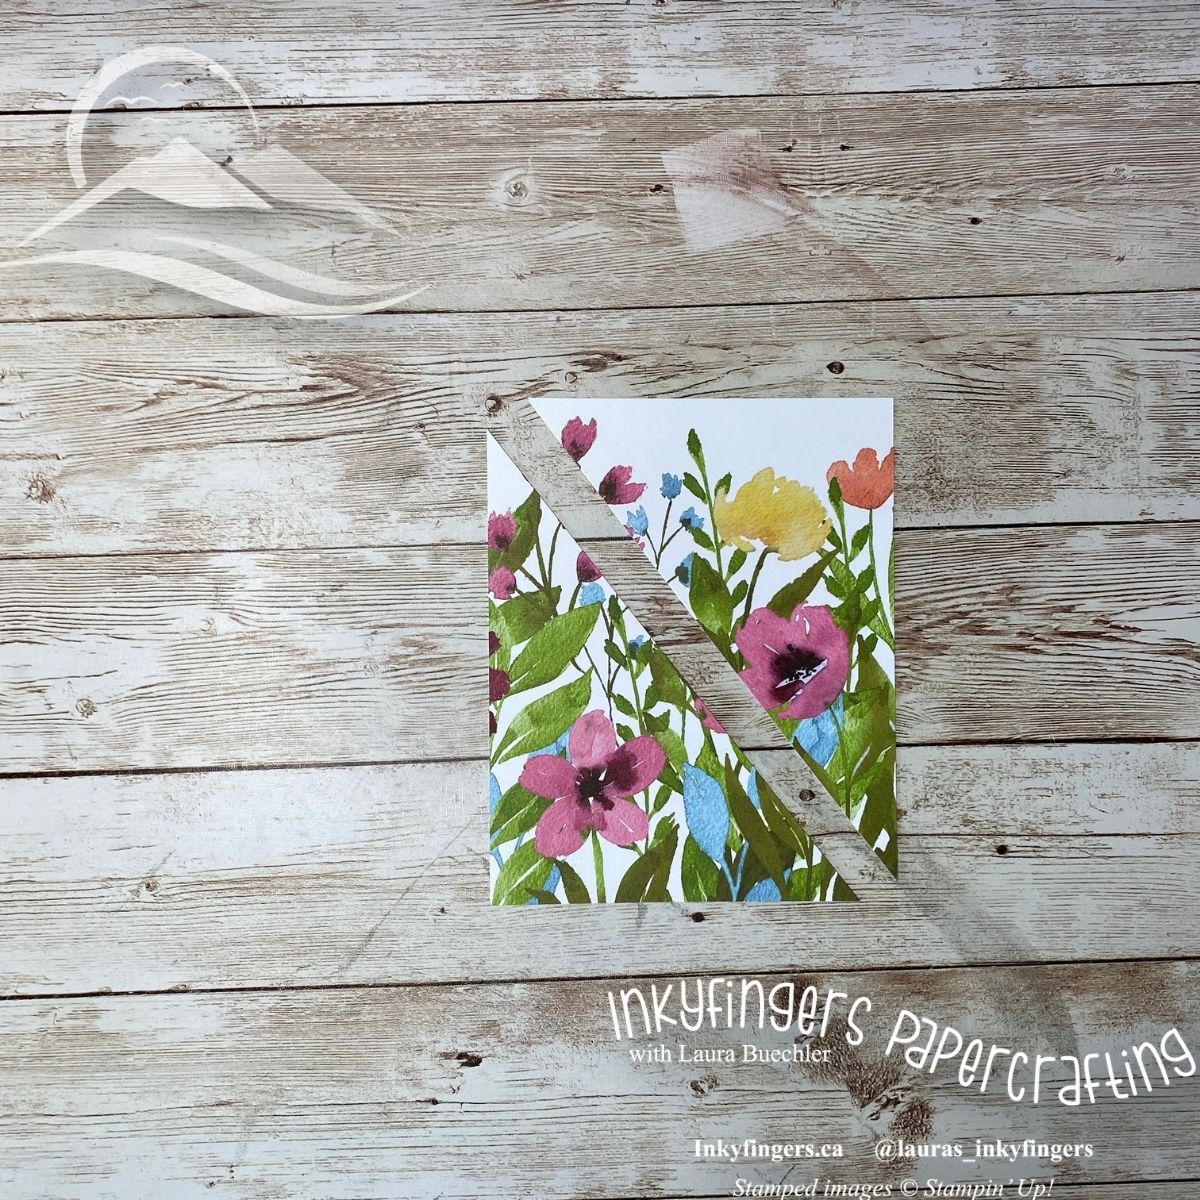
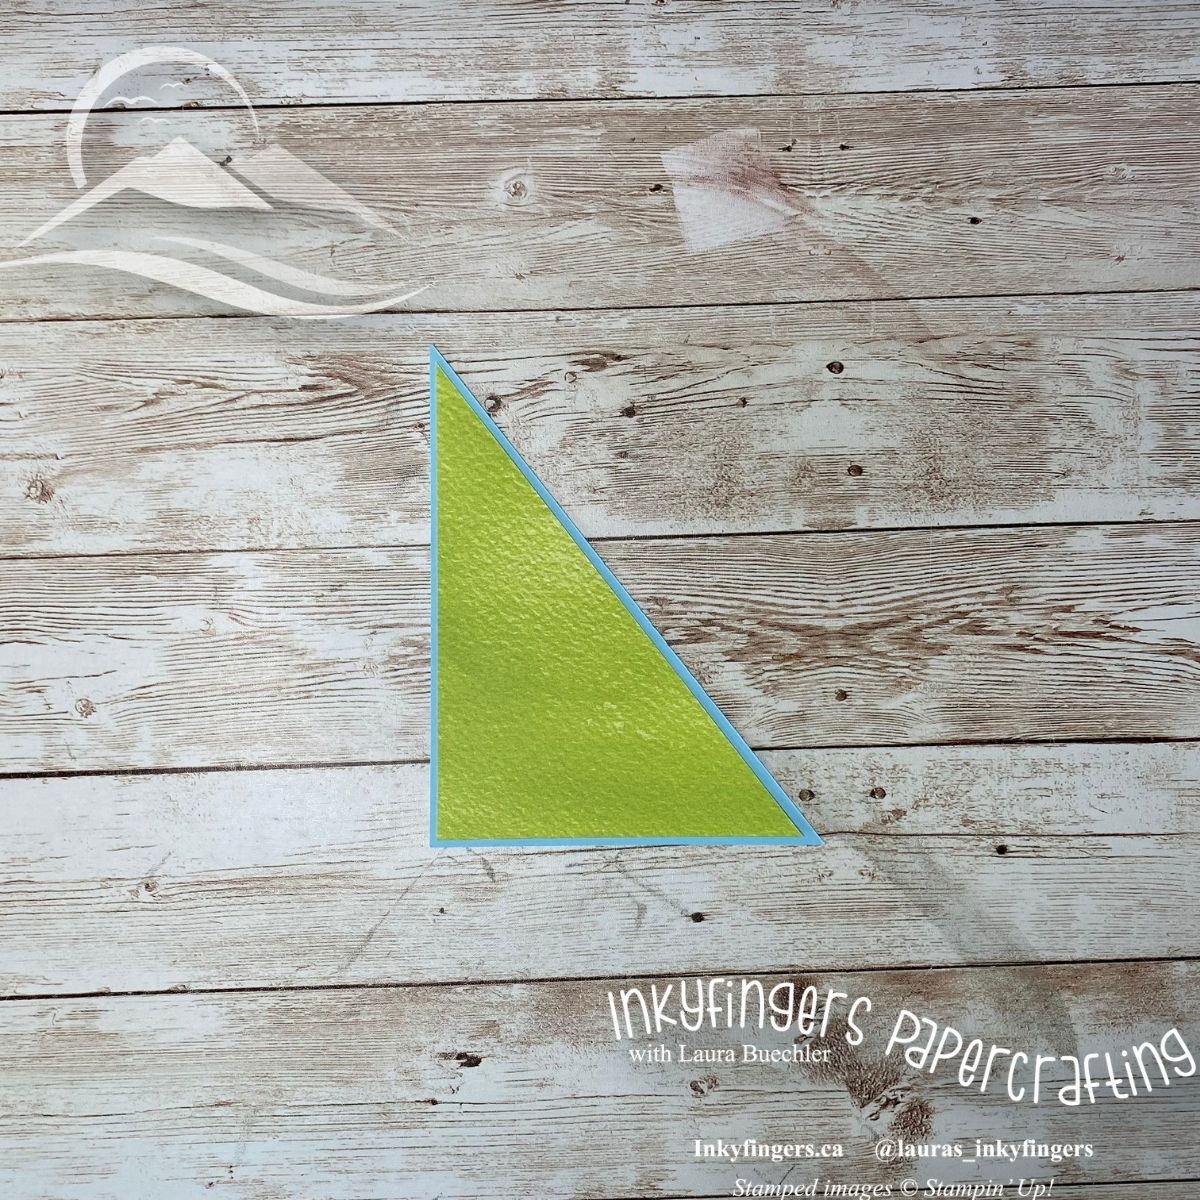
Cut two of your large DSP pieces in half diagonally, from the top left to the bottom right corner. Set these aside.
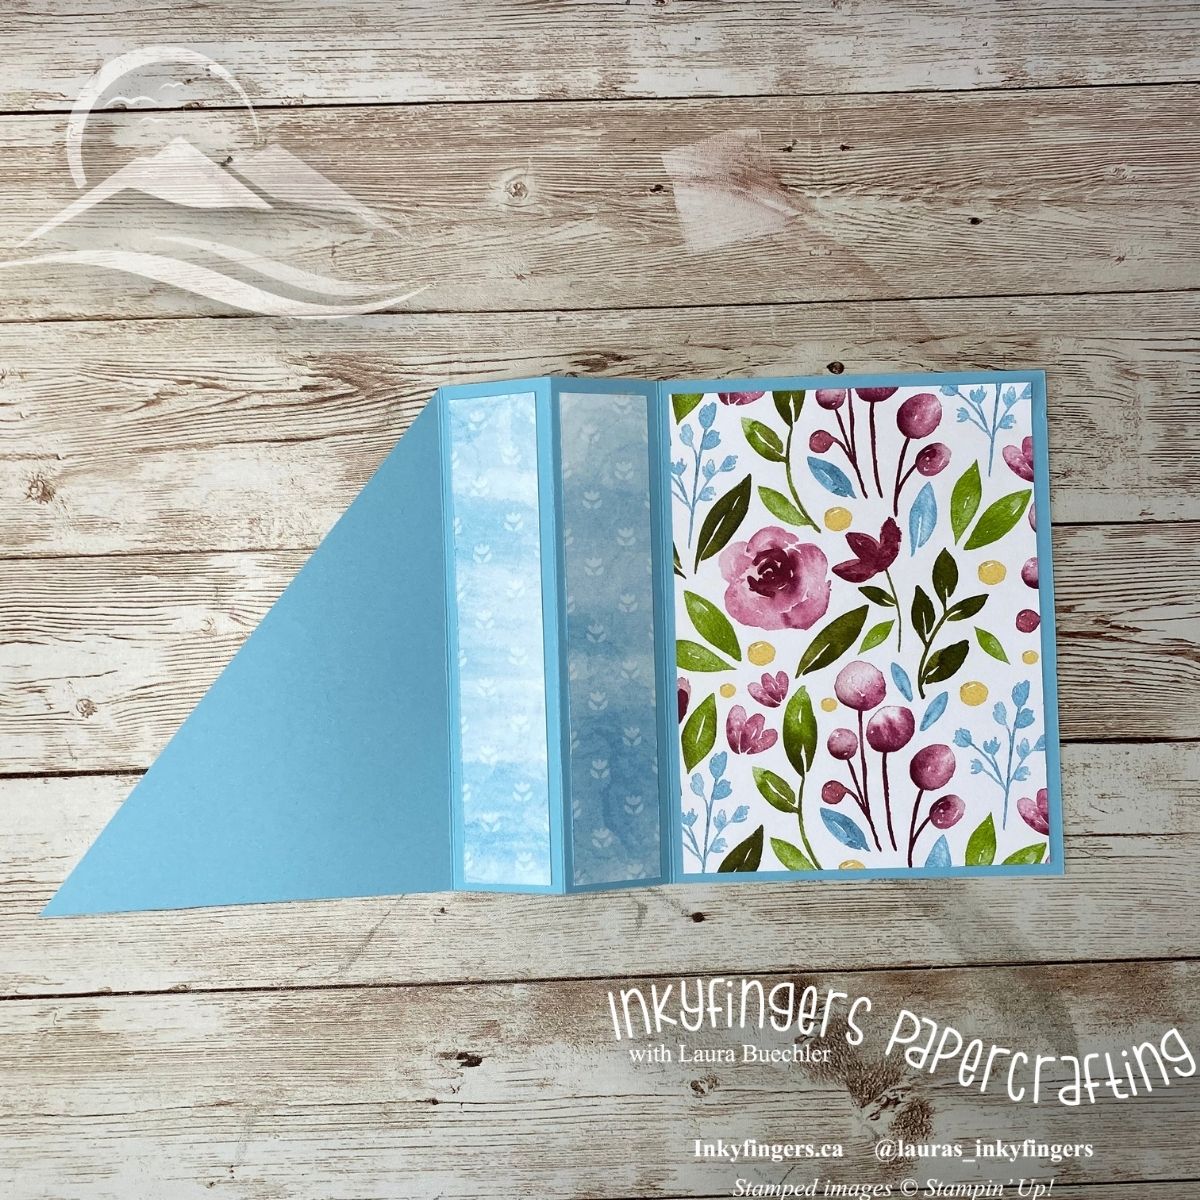
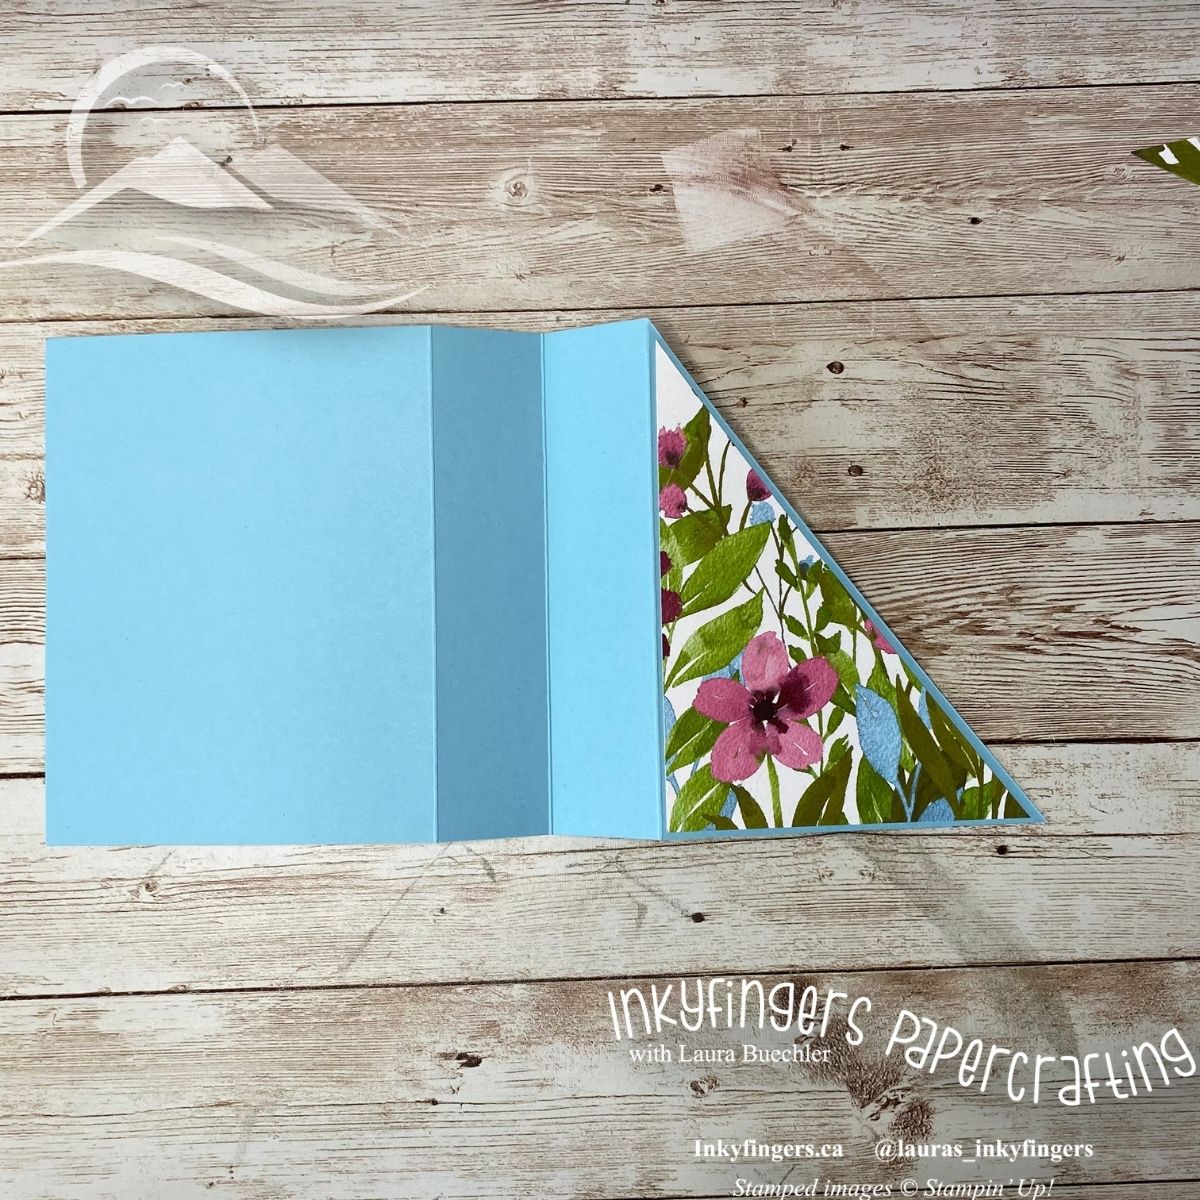
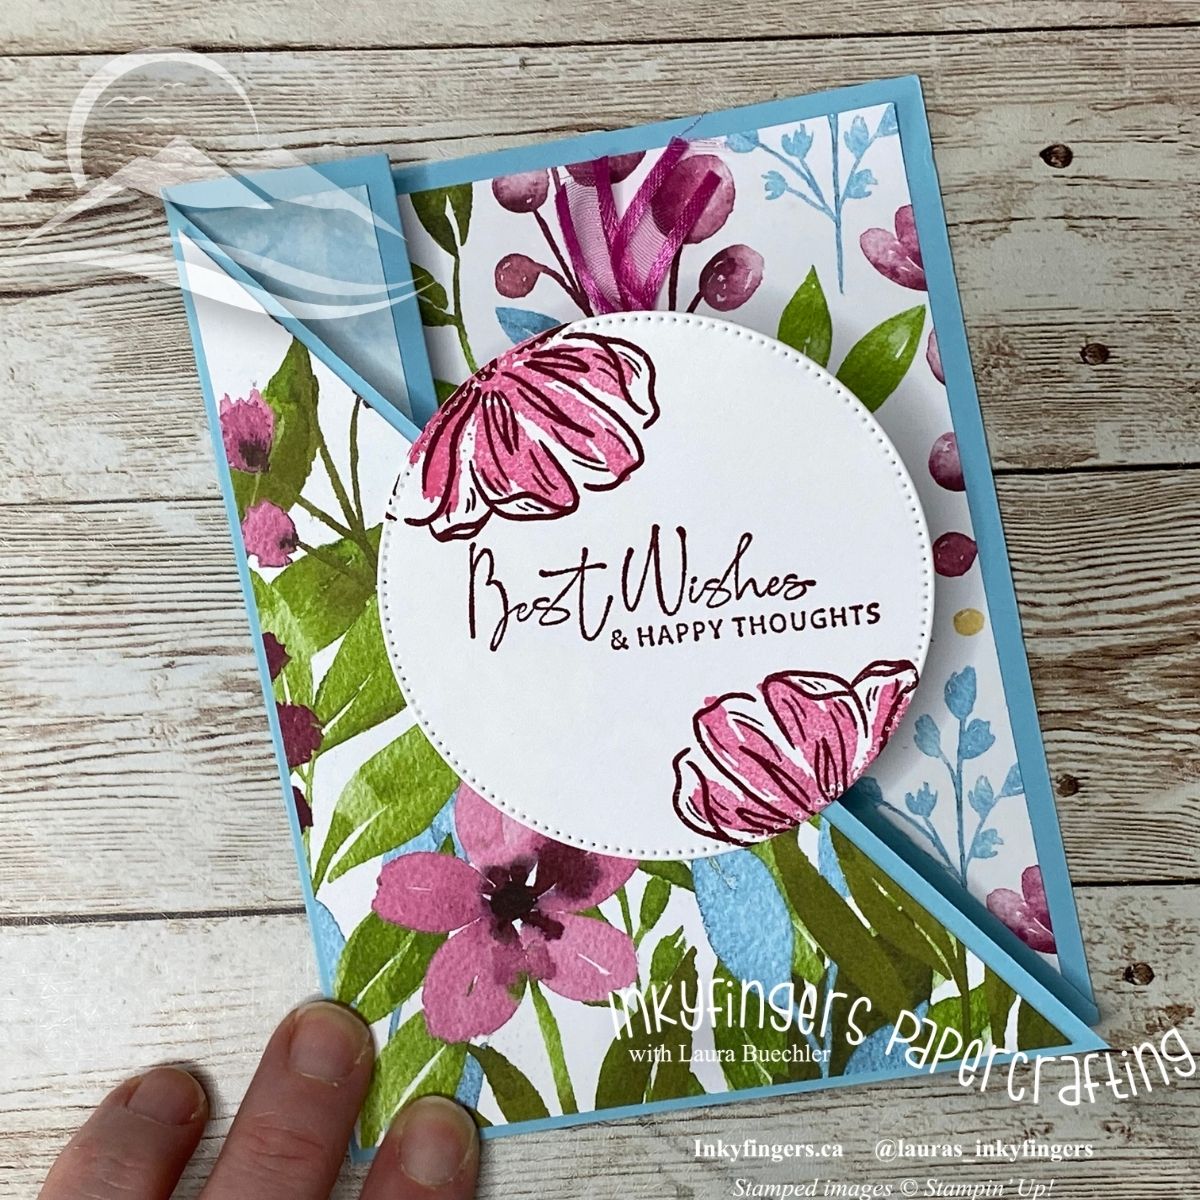
Attach your other three pieces of DSP as shown. This is the inside of the card.
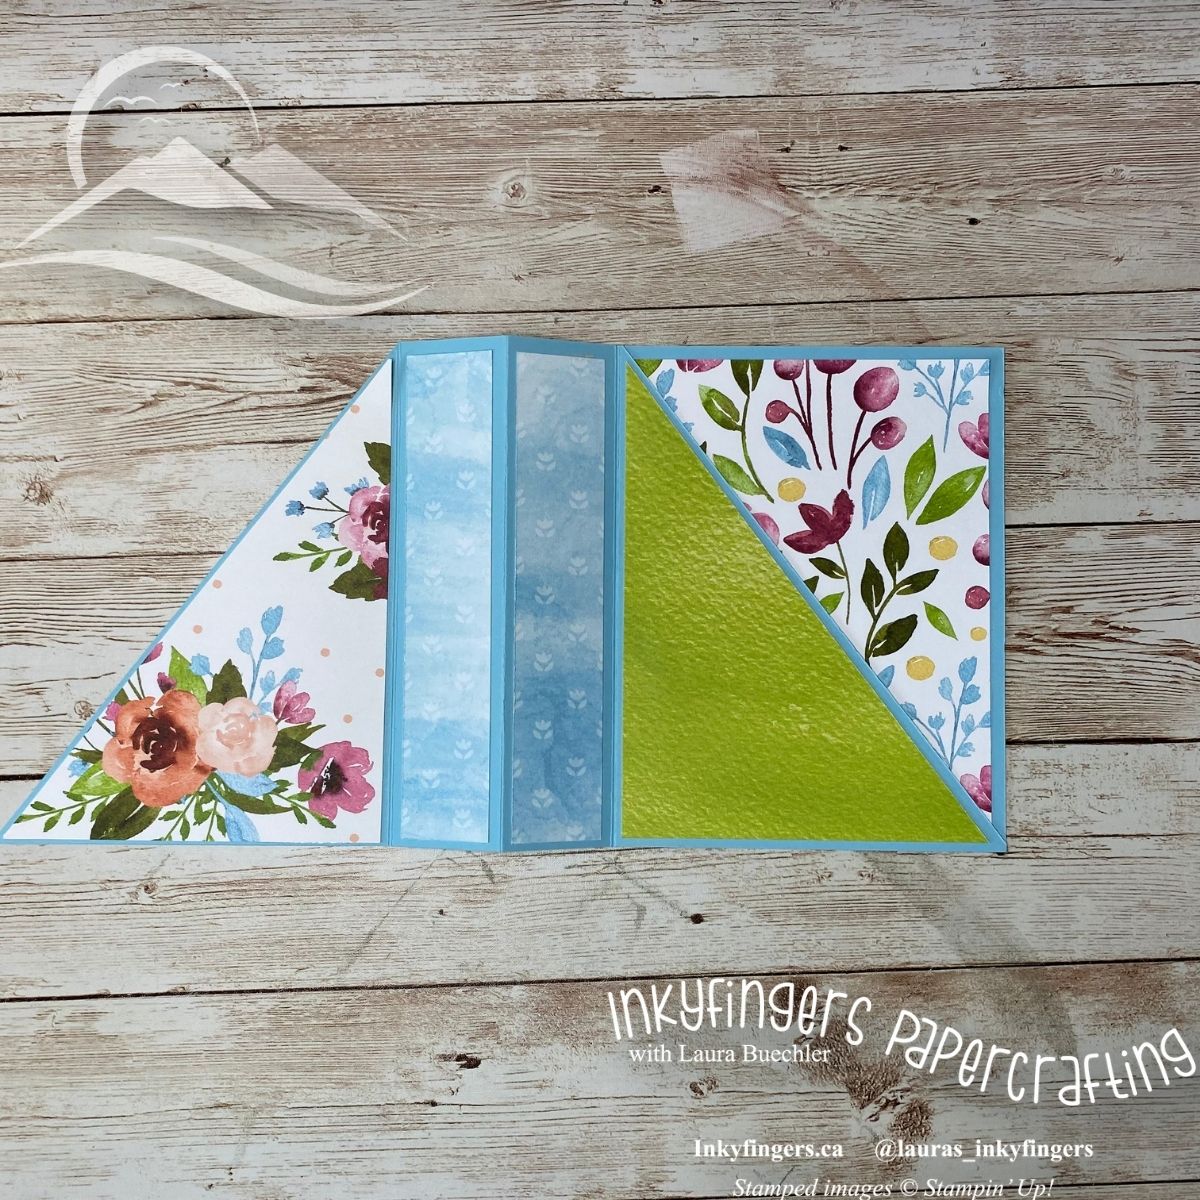
Retrieve the cardstock triangle you cut off in a previous step. Attach one of your DSP triangles to it, in the orientation shown below.
Flip over your cardbase so you are looking at the outside of the card. Attach another DSP triangle to the front of your card, as shown.
Attach your third DSP triangle to the inside left of your card, as shown.

Apply Tear & Tape to the back of your cardstock triangle as shown.
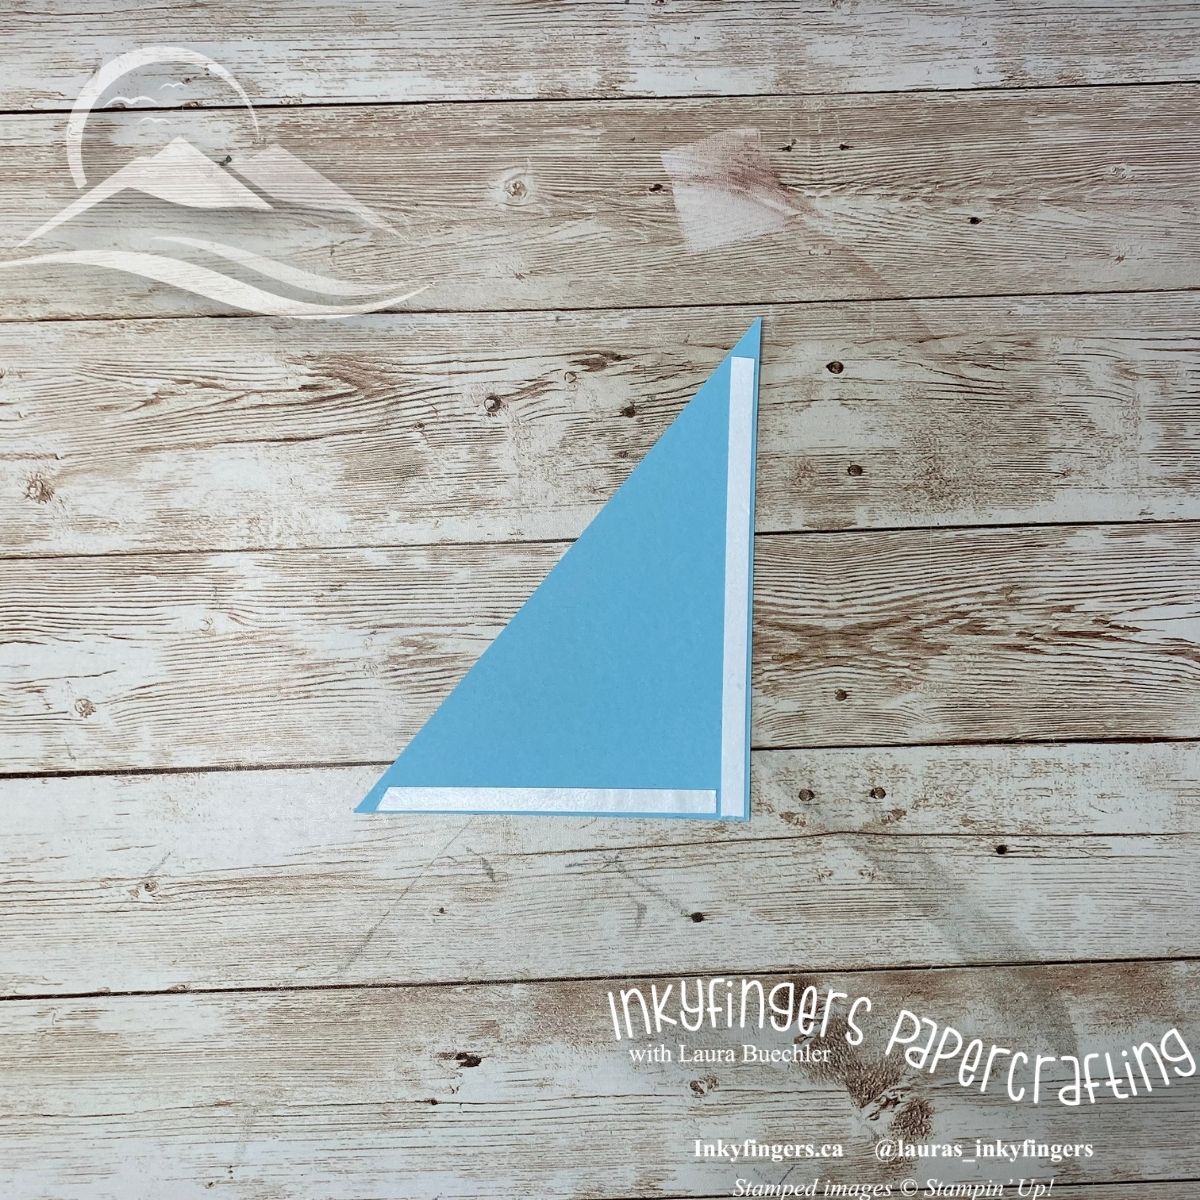
Attach this triangle to the inside right of your card, to create a pocket (note that the diagonal side remains open, for you to slide in a gift card or money).
Another fun thing to slide inside is a tag! I created this one using the Tailor Made Tag dies.

Finally, decorate the front of your card as desired. Remember that when you attach a shape to the front, apply adhesive only to part of the card, so that your card will still open.
Once you’ve made your own Accordion Pocket Fold Card, come and share a photo with me on my Facebook page! I love to see your creations!
Happy Stampin’!

 Designer Series Paper")


")
")


